Compatible with MoTeC M8, M4, M48, M2R, MLS Goldbox ECUs.
Please submit any requests to change into in this document via the Contact Us page. If some info is hard to understand or incorrect, please let us know. Thank you!
You can download a PDF copy of this write up here:
UPDATE 1: ECU Pin Function under “Wiring and Connections”.
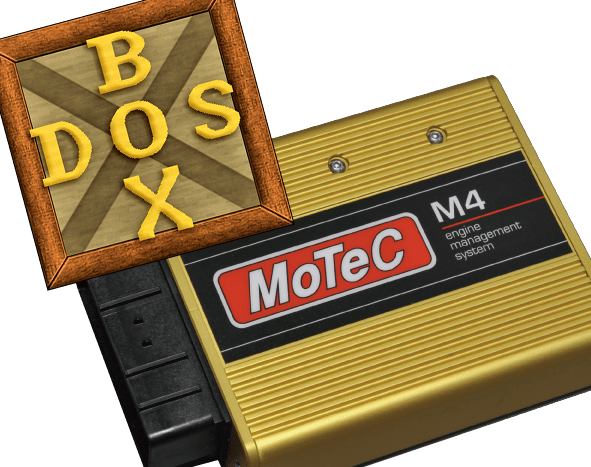
Table of Contents
- Introduction ……………………………………………………………………………………………….. 1
1.1 Overview …………………………………………………………………………………………….. 1 - Prerequisites and Configuration …………………………………………………………………. 2
2.1 Serial Cables & USB Adapters ………………………………………………………………. 2
2.2 Installation of MoTeC ECU Manager ………………………………………………………. 3
2.3 Installation of DOSbox: The MS-DOS Emulator ……………………………………….. 4
2.4 Installation of RealTerm Serial Port Monitor …………………………………………….. 6
2.5 Wiring and Connections ………………………………………………………………………… 7
2.6 Starting RealTerm and Checking for Communication ………………………………… 8 - Starting DOSBox and MoTeC ECU Manager ………………………………………………… 9
3.1 Bypassing The DOS Command Line …………………………………………………….. 13 - Troubleshooting & Support ………………………………………………………………………. 14
4.1 Installing Older Versions of MoTeC ECU Manager ………………………………….. 14
Introduction
This manual will cover connecting a modern Windows 10 PC to a M8, M48, M4, M2R,
and MLS using the DOSBox Emulator. These models used a DOS based software
called MoTeC ECU Manager that is no longer supported on modern Windows PCs.
Thanks to the DOSBox DOS Emulator we can reestablish communication and
functionality to these retro pieces of Motorsport hardware.
Overview
This document will cover all required software and setup to establish communication
using a DOS emulator, throughout this manual we will install DOSBox, RealTerm Serial
Monitor, and the required MoTeC ECU Manager software, along with any required
drivers for our serial devices. While having physical serial port on your PC is
recommend, it is not required. Many USB-to-Serial adapters work just as well when they
have the correct chipset and drivers.
- Overview of Serial Cables & choosing the correct one…
- Installation of MoTeC ECU Manager…
- Installation of our DOS emulator to run the MoTeC software…
- Installation of a serial port monitor software for diagnostics…
- Setup of our DOS emulator and identifying which COM port to use…
- Wiring our MoTeC device to our PC…
- Establishing Connection…
2 | Prerequisites and Configuration
2.1 | Serial Cables & USB Adapters
For M4 ECU’s before serial number 3000, along with all M8 and M48 ECU’s will require a TTL serial adapter. These units did not use standardized RS232 protocol. Thus, a different voltage logic level of 3.3v is used instead of 5v.
- If you have an original MoTeC communication cable, this guide will still apply to you.
- If you do not have an original MoTeC cable, and require the TTL logic levels, you can build your own, or contact us to make one for you.
- If you have an M4 ECU with serial over 3000, M2R or MLS you can use an USB-to-RS232 adapter, or a native built in serial port.
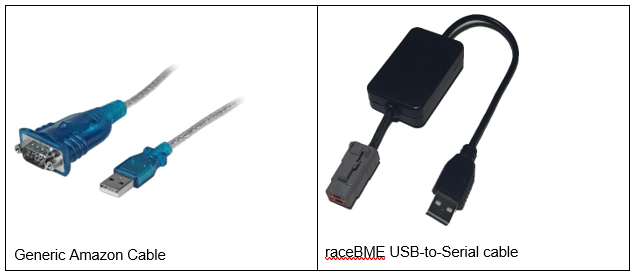
For USB-to-RS232 adapters, the Prolific PL2302 chipset is recommended. These
generic PL2302 cables are available on Amazon, or a more robust and configurable
cable is available from our website: http://www.racebme.com/usb-to-serial-adpater/
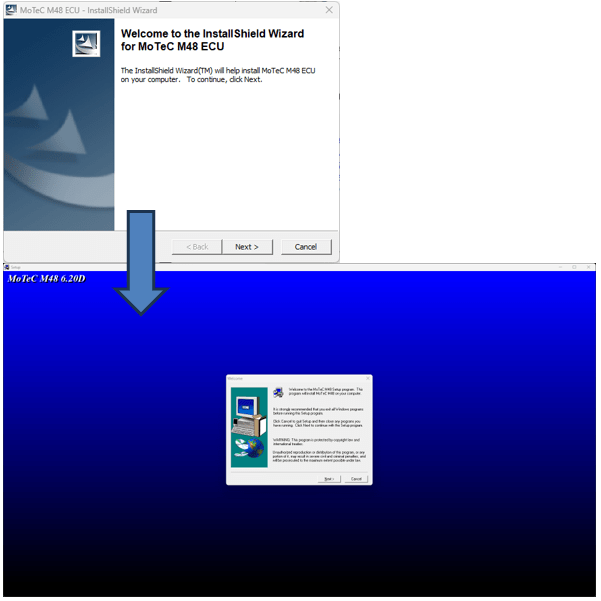
2.2 | Installation of MoTeC ECU Manager
Simply visit MoTeC’s website at http://www.motec.com.au/downloads and find your
corresponding ECU’s software. Each version indicates a different firmware, although
knowing your firmware is not crucial until communication is made. Once your PC is
connected to the ECU, it will warn you of the firmware incompatibility, displaying the
ECU firmware version and either ask to upgrade or disconnect. For this reason,
download the latest version to start. If you do not wish to upgrade, you can then go back
to MoTeC’s website and download the correct version.
Once the installation is complete, proceed to the next step to install DOSBox.
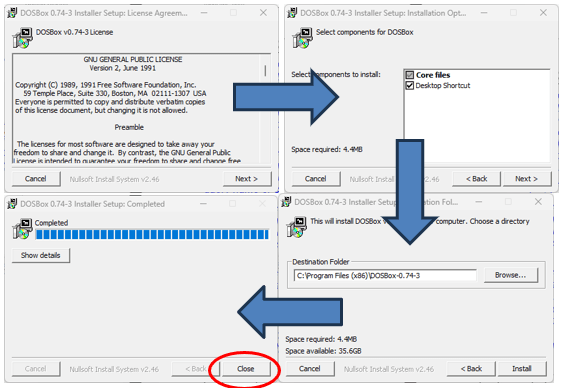
2.3 | Installation of DOSbox: The MS-DOS Emulator
Visit http://www.dosbox.com and download the latest release of DOSBox. The installation is
straightforward, just click next until finished. There will be more setup later on, as we
need to configured to COM port and load the MoTeC Software.
After the installation is complete, we need to connect our USB-to-Serial Adapter and confirm our COM Port number. Right click on the Windows Start button, and select “Device Manager”.
With our adapter connected, we should see it under “Ports (COM & LPT)”:

This indicates that our adapter is on COM3. Yours may not be!
You can plug and unplug the adapter to see which COM port disappears and reappears if the options on the list are not obvious.
If you are using a native/built-in COM port, you will need to find a method to determining which one you plan to use. These are commonly listed as “Communications Port (COM1)”, “Communications Port (COM2)”, and so-on. Once you know which COM port you plan to use, continue to configure DOSBox…
Once DOSBox is installed, a change to the configuration file must be made to enable to
the serial port functions. Click the Windows Start button, and begin to type “DOSBox”. A few options will appear. Click DOSBox Options as shown below.

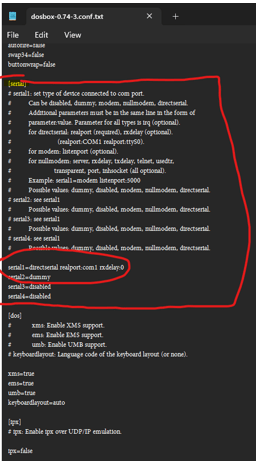
This will open a Notepad file containing all the configuration info, and this is where the
serial ports will need to be enabled and configured. Scroll until you find [serial].
The first line should read “serial1=dummy”.
Change the entire line to “serial1=directserial realport:com3 rxdelay:0”.
Note the highlight yellow text, this ‘com3’ variable might be subject to change. If your
serial adapter is on COM1, COM2, etc. In this example, it is set to COM3 because that’s
what our adapter is in the screenshot above.
Save the file and exit.
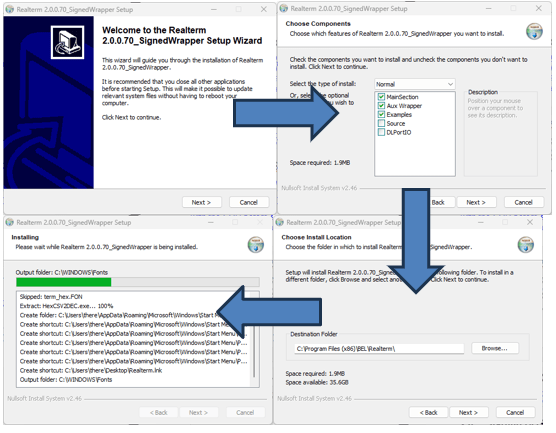
2.4 | Installation of RealTerm Serial Port Monitor
Visit http://www.realterm.sourceforge.io and download the latest release of RealTerm. This
will be the serial port monitoring software used to validate communication is being made
with the ECU before starting DOSBox. This is a useful way to check and confirm our
wiring, ECU, and serial cable or adapter is functioning properly without worry if either
DOSBox and MoTeC software is causing an issue.
Once the installation is complete, we will be finished with RealTerm for now. We will start RealTerm for the first time right before we connect and power up the ECU.
2.5 | Wiring and Connections
Once our software is setup and installed, ensure your device is wired properly before attempting to communicate with the PC using the diagrams below.

NOTE: Although the MoTeC user manual indicates more pins are needed on some
ECUs such as the M4 shown below. Only 3 wires are needed for serial.
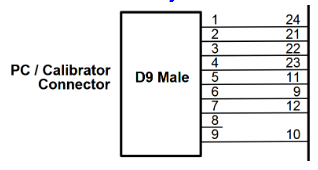
REMEMBER:
- TX from the ECU goes to RX of the PC
- TX of the PC goes to RX of the ECU.
- The pin numbers of the D9 connector are mirrored from Male to Female.
- ECU Pin 22 is Tx, ECU Pin 23 is Rx, ECU pin 21 is Ground.
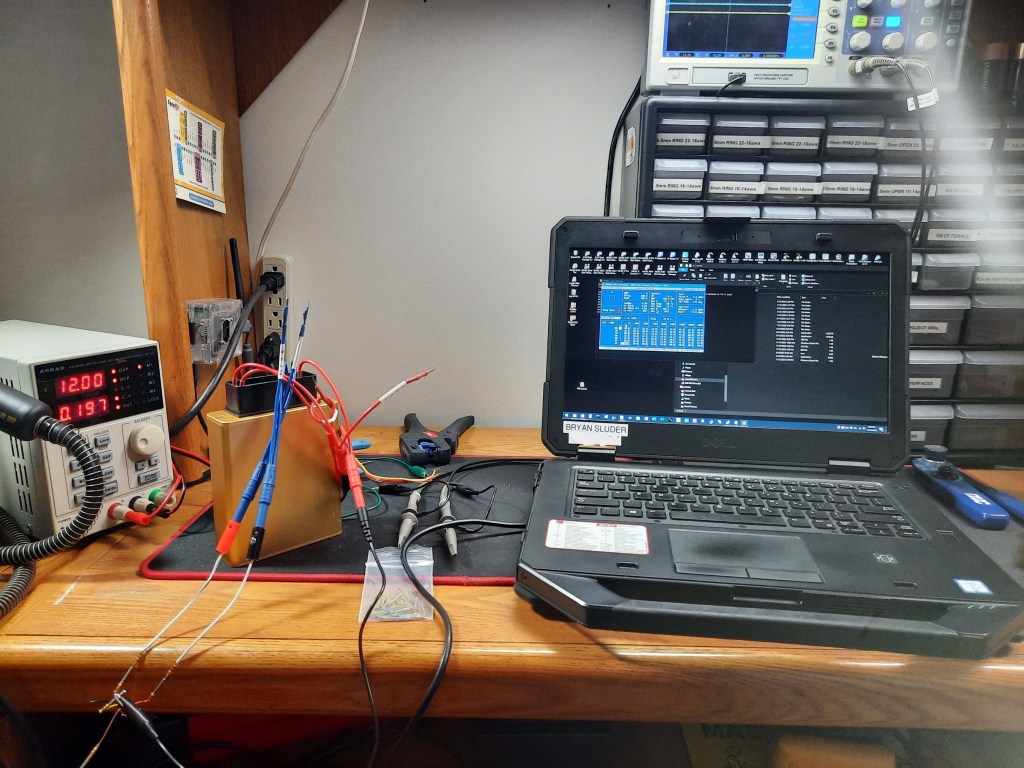
2.6 | Starting RealTerm and Checking for Communication
Now that the wiring and connections are made, start RealTerm to initialize our COM
port and start monitoring.
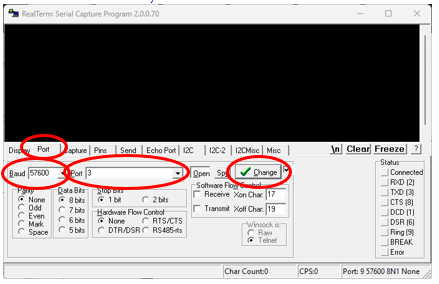
Select the “Port” Tab, set “Baud” to “57600” and “Port” to “3”. Lastly, click “Change”.
Now power on your ECU, and you should start to receive serial data!
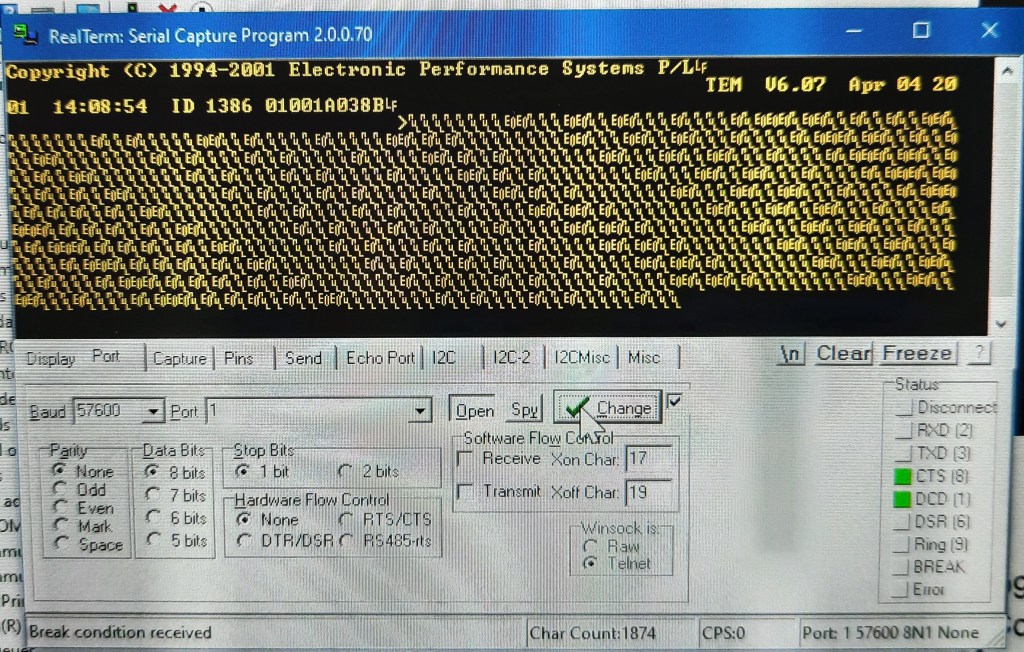
At this point, our ECU is communicating, and the top row of words are legible
We are ready to start the MoTeC software in DOSBox.
HINT: If you are not receiving data, recheck your COM port or try another.
If you are receiving jumbled non-legible text, adjust the baud rate until you do.
3 | Starting DOSBox and MoTeC ECU Manager
To start DOSBox, use the Desktop icon or shortcut in the start menu.
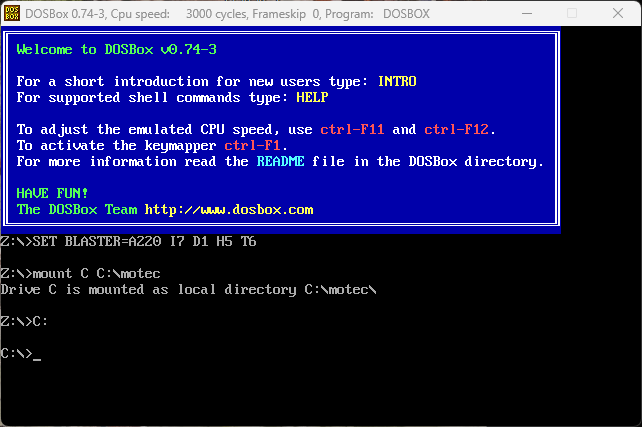
Once open type “mount C C:\motec” then press ENTER.

This add the MoTeC folder on our Win10/11 machine with DOS MoTeC Software to
DOSBox local directory under a virtual drive named C:
Next, we need to mount DOSBox to that directory by typing “C:”.
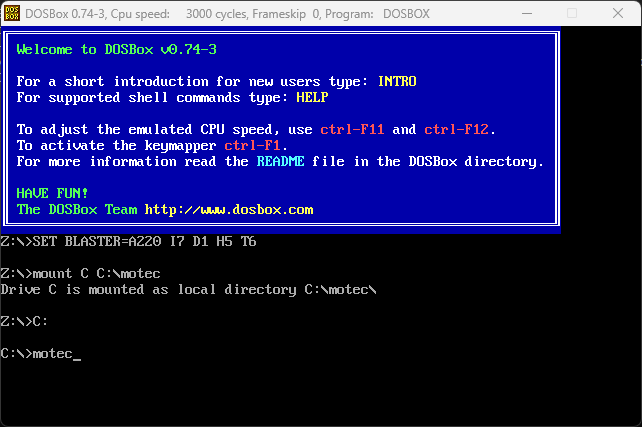
From here, DOSBox is mount to C:\motec. Type “motec” to start the ECU Manager Software.
At this point you should be greeted with a message to select your type of ECU. These
menu options will depend on the various types of Goldbox ECU managers you have
installed. If your ECU is missing from the list, ensure the software is installed, or attempt
to reinstall it.

You will next be asked to select the version of firmware, this also depends on the
current installations on your PC. Go ahead and click one and proceed.

After selecting your version, you will now need to set the COM port.
Press F5 to open the “Select COM Port” dialog box.

Select the corresponding COM port from before, and press ENTER.

Power your ECU on, and you should see a message in the top right indicating you are
connected and the firmware version on the ECU. You may receive an error stating the
software version does not match the ECU. If that is the case, note the ECU firmware
version and download the corresponding version from MoTeC’s website. Close
DOSBox, install the correct software, then restart DOSBox and try again.
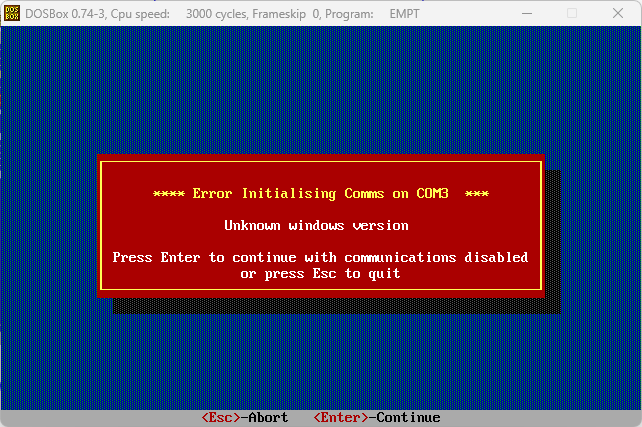
You may also receive this error. Its very common to experience this, typically it will be
because you’ve selected the wrong COM Port, or your COM Port’s baud rate is
incorrect.
NOTE: Older versions of software do not like being installed under any 64-Bit
machine, following the troubleshooting guide below on using DOSBox to install
them.
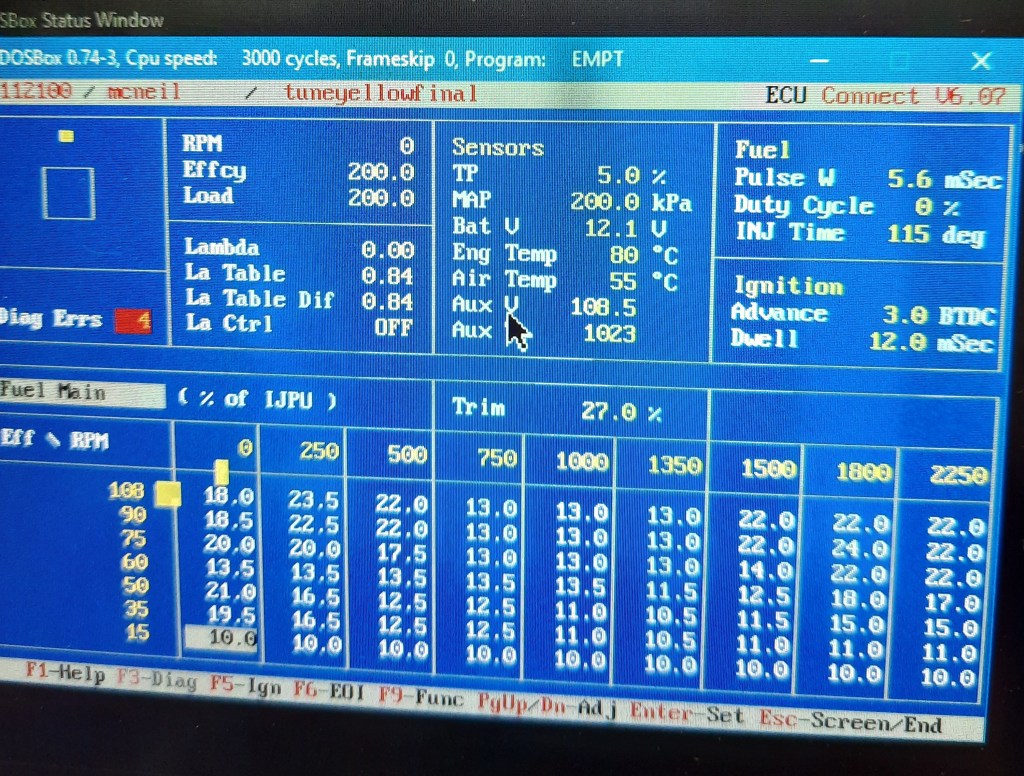
If all went well, you should be able to open the calibration software and view your ECU’s
Parameters as shown!
3.1 | Bypassing The DOS Command Line
If you want to skip all the command line in DOSbox paste this at the very end of the DOSBox
configuration file under [autoexec]:
MOUNT C C:\motec
C:
motec
This will automatically boot DOSbox into the MoTeC ECU Manager.

4 | Troubleshooting & Support
This section will cover known issues with this technique and be updated to reflect fixes
and workarounds.
If you have any questions or need assistance, please contact us.
4.1 | Installing Older Versions of MoTeC ECU Manager
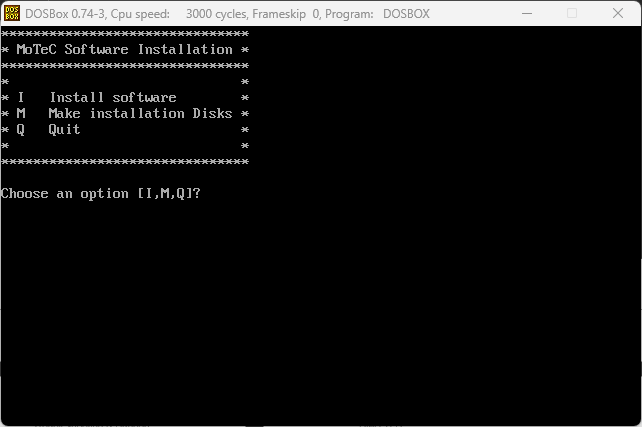
The most recent version of the M4 software will install. Anything older will give you this
error message. Here is the workaround:

Even though you receive this error, some files are still placed in the C:\motec folder we
can use.
- Start DOSBox and mount the C:\motec folder.
- Type C: to change to our MoTeC directory.
- Type “cd make” to move into the folder the failed installer made.
- Type “dir” to list all the folders.
You should see a directory named after the version of software you want to install.

- Type “cd” then whichever version you want to install.
- Finally, type “install” and follow the on-screen instructions.
Once this is finished, you will need to move the newly installed files to the correct folder.
Since DOSBox believes its operating the C: drive, it makes another folder called
MOTEC in our C:\motec directory. (C:\motec\MOTEC).
We need to move the folder for our newly install version from C:\motec\MOTEC and
place it in C:\motec.

Now you can restart DOSBox and ECU Manager, the new firmware has been added.
Thank you for visiting my website, I hope this write up helps breath new life in those that obsolete Goldbox ECU!
If you need any assistance or found an error in this write up, please let us know!